- Students will observe and identify the function and form of an item of everyday use and understand how it was made.
- Students will practice routines for working with clay and strategies to create a functional object.
Cognitive Development: CD-4, CD-5
Cognitive Development: CD-9
Cognitive Development: CD-15
Prep
Cut up a baseball-size ball of clay for each student, plus extra for demonstration and for students who need more. It is helpful to place these balls on a baking sheet and cover with a damp towel until ready for use (like biscuits).
Set Up
Cut a placemat of butcher paper for each student (if not using Styrofoam plates).
Introduction/ Warm-Up
- Begin by asking: What did you drink this morning? What was the shape of the object you used to drink out of? Have them describe it with their hands. Share ceramic mugs for students to see and touch.
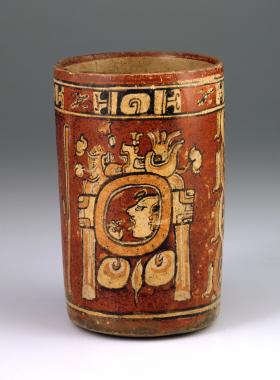
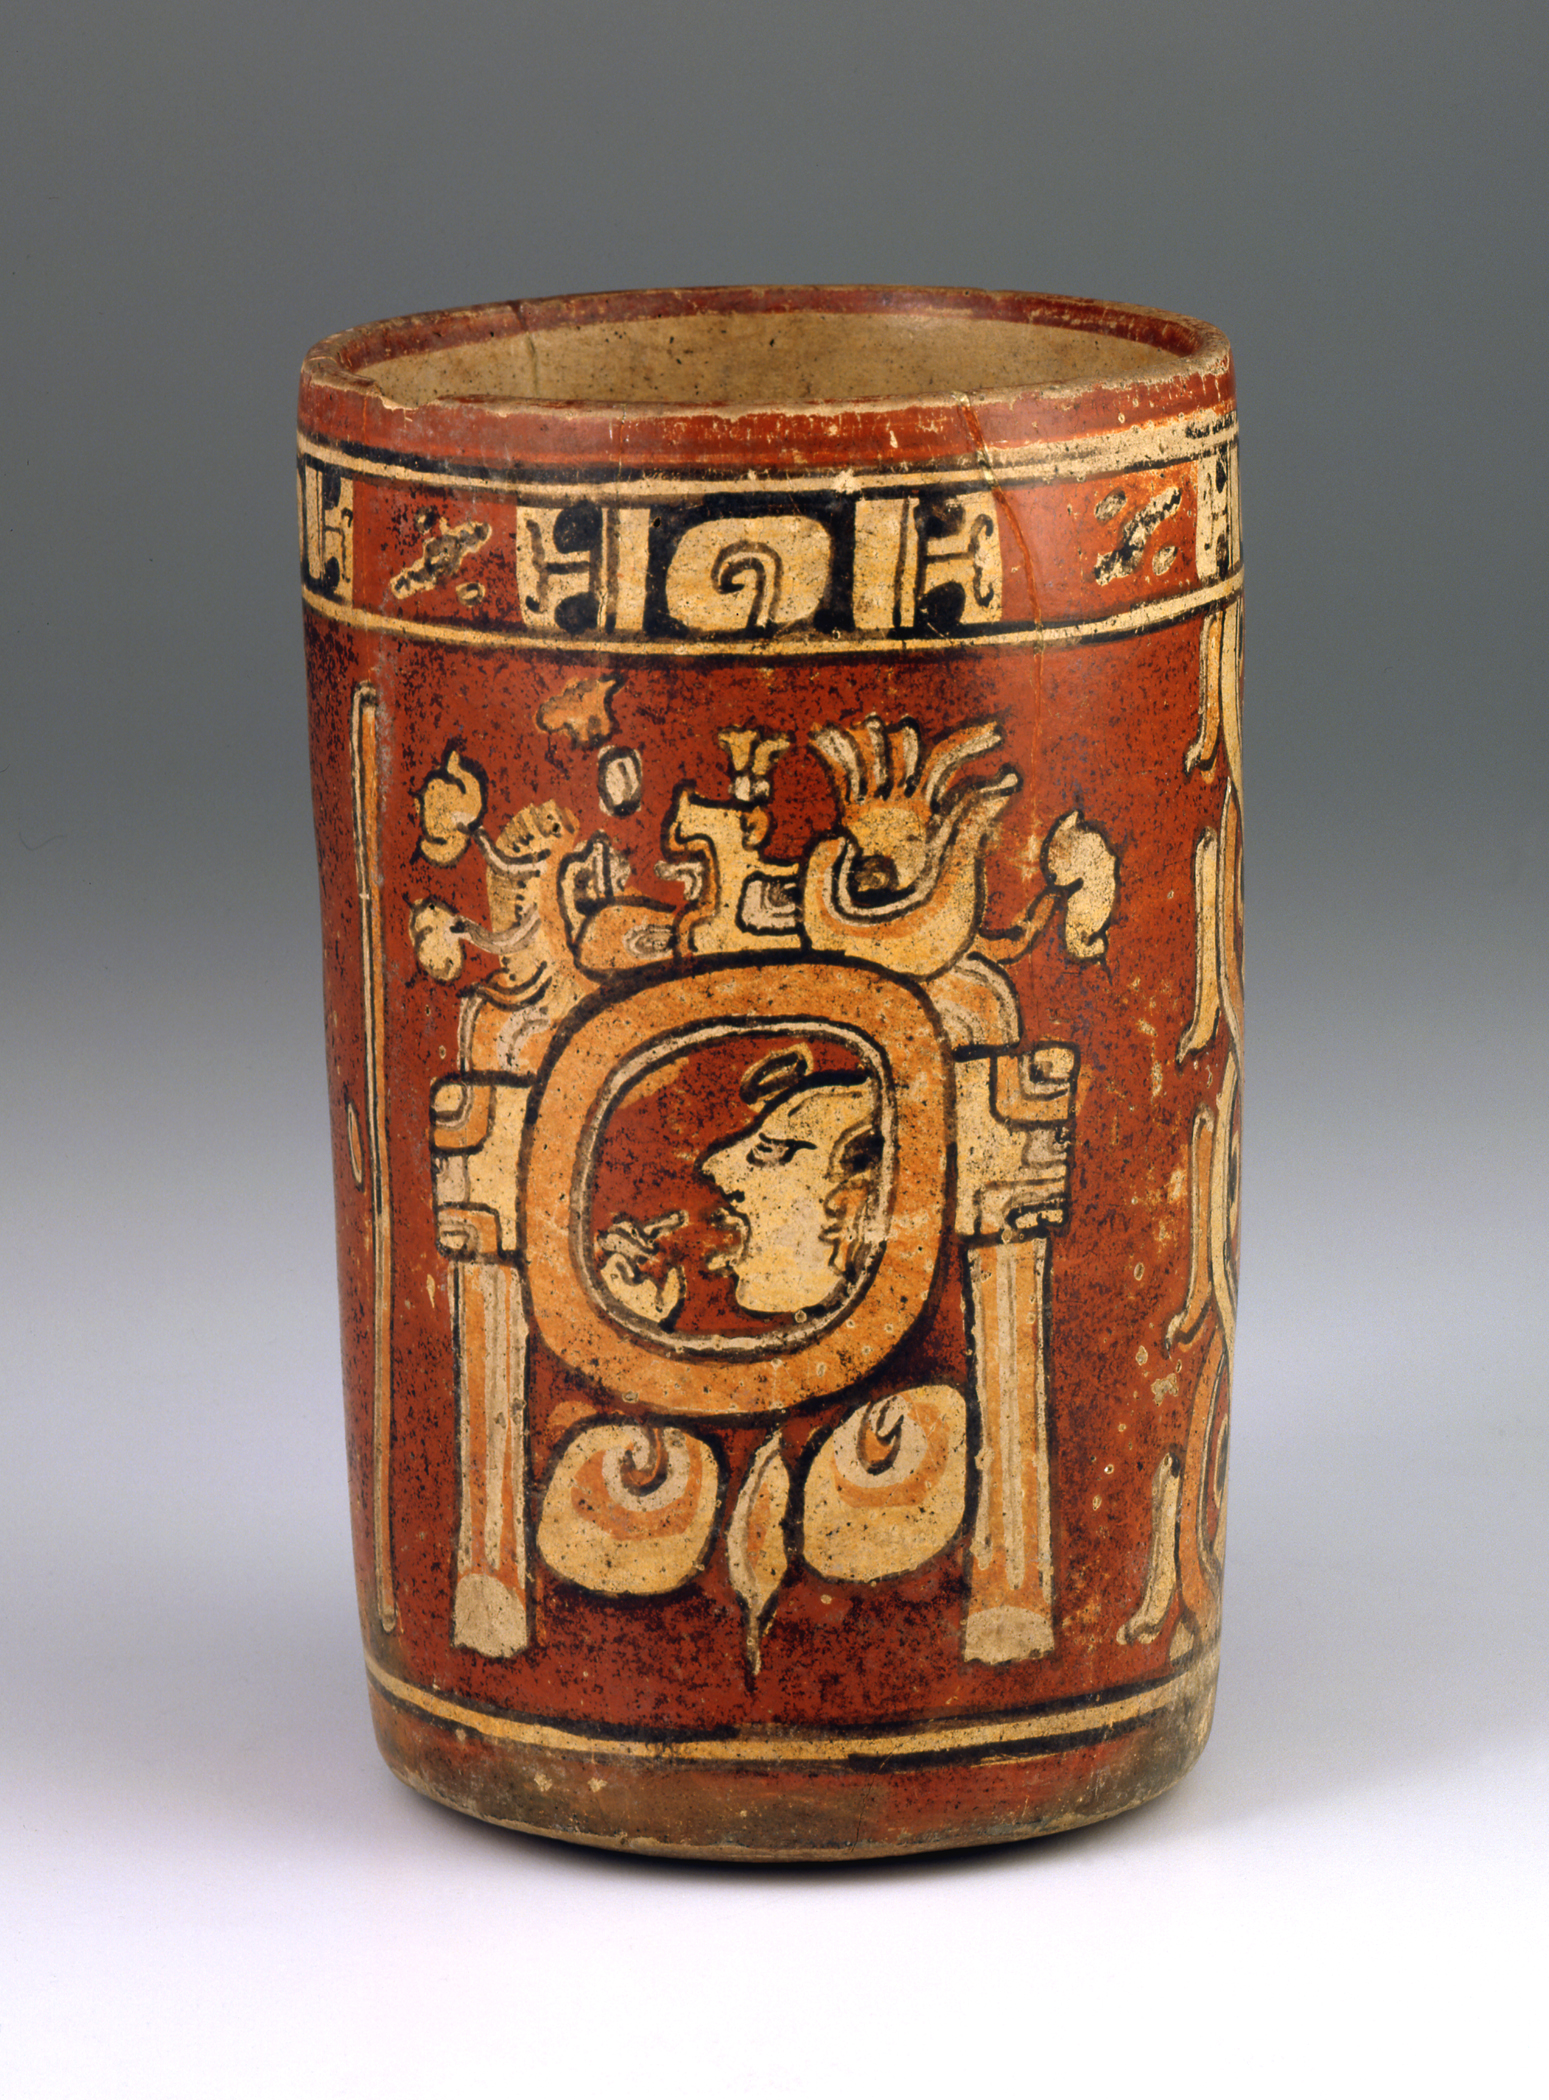
- Introduce the image of the Cylinder Vase, and ask students to use their imaginations and describe what kind of drink such a cup could hold and who might use it. Tell students it was made a very long time ago in Guatemala. (Possibly show students the location of Guatemala or Central America on a map.)
- Ask the students to guess the material the artist used to make the cup. Tell students that this is a cup used for drinking hot chocolate.
- Tell them the cup is made from clay. Clay is a material that comes from the earth (like thick mud). Tell students they are going to make their own cups using clay. Explain that these cups will be artworks, rather than something students will use to drink from.
- Ask students to describe the important parts of a cup. (Tall sides, bottom, no holes, strong edges.)
- Demonstrate how to make a cup, using the “pinch pot” method. First, make a ball from the clay. This ball should be a little smaller than the size of a baseball. Using your thumb, demonstrate poking a hole in the center of the ball of clay, while keeping your other fingers on the outside of the clay ball. Then you will use “pinching” fingers to gradually make the hole larger, which at the same time creates the walls of the cup. Emphasize that the cup needs a bottom, so they don’t want to poke all the way through the ball.
- Tell the students that first they need to warm up their hands (because you need very strong hands to sculpt with clay), and they also need to warm up their clay. Excuse students to their tables to begin working.
Focus Activity Procedure
- Students should have a piece of brown paper (butcher paper) or a Styrofoam plate with a piece of clay at their place.
- Students should roll or pat their clay into a ball and then poke their thumbs in to begin creating their cups, using the “pinch pot” method.
- Teachers should circulate and help students with their decisions and problem solving.
- When students are finished, teachers can write students’ names in marker on their butcher paper or Styrofoam plate and set it in a safe place to dry.
Closing
- Clean up: extra time should be allowed for hand washing.
- Gather class for closing routine, and invite the students to describe their cups using descriptive words. Encourage students to also describe how they sculpted their cups and what they would drink from them if they were ancient royalty.
- Ask students to look for art all around them at home and at school.
1. Assess student’s ability to create a functional cup through (1) observation and (2) discussion with student. Have students identify a cup’s parts and characteristics and compare those elements with the works they make.
2. In closing discussion, ask students to identify similarities and differences between their cups and the Cylinder Vase and describe the properties of clay.
clay
Guatemala
Air-dry clay (terra cotta color)
Butcher paper or Styrofoam plate
Different ceramic mugs or cups, handmade if possible
Extension Activities for Teachers
- Use various malleable sculpting materials at home or school including Play Doh, homemade play dough, purchased clay, self-hardening clay, etc. Use for creation of other functional pieces such as plates, utensils, pots, or bowls. Stamped tiles, cookie cutter shapes/ornaments can be used for added texture.
- Once their artwork is dry, students can paint their cups during center time. One possibility is to have the image of Cylinder Vase available so students can see where the writing of the hieroglyphic date is located. Students might want to paint or write their names or make simple line designs as seen.
Extension Activities for Families
- Call attention to the materials used for functional cups, bowls, and plates at home. Notice if they have painted designs or plain colors. Are some made by hand? Is there a special cup you use for hot chocolate?
Suggested Books for Classroom Library
Gibbons, Gail. The Pottery Place. Harcourt Childrens Books, 1987. [ISBN-13: 978-0152632656]
Hill, Laban Carrick. Dave the Potter: Artist, Poet, Slave. Little, Brown Books for Young Readers. [ISBN-13-978-0316107310]
Luxbacher, Irene. 1 2 3 I Can Sculpt! Kids Can Press, 2007. [ISBN 973-1-55453-038-0]

Beautifully painted cylinder vases were used by the Maya ruling elite for drinking chocolate beverages. This vase is painted with an elaborately rendered hieroglyphic date in the Maya calendar, which is equivalent to December 5, 711. Part of the date glyph is represented by the profile head of the Young Corn God inside a daysign cartouche. The cartouche is flanked by two square signs that refer to the partition between natural and supernatural realms. Atop the glyph is the hunal, the headdress of kingship, with its white cloth tie-ends draped on either side of the cartouche. These are apt symbols for a chocolate beverage drinking vessel used during important sociopolitical meetings among the Maya ruling elite.
Although painting was one of the principal forms of artistic expression among the Maya, few of their frescoes and almost none of their illustrated books survive. Thus, vase painting is the best source of information about this virtually lost art. The best painted ceramics were prestige items used by the wealthy classes; they survive because they have been preserved in tombs. Made by the coil method (the Maya did not use the wheel), some of the finest pots include inscriptions suggesting that the painters who made them were members of the royal family, possibly sons who were not in the line of succession to the throne. As individuals schooled in hieroglyphic writing, all master pottery painters belonged to the elite class of Maya society.